How to Choose and Use a Compact Electric Food‑Waste Recycler for Your Studio Apartment
Introduction
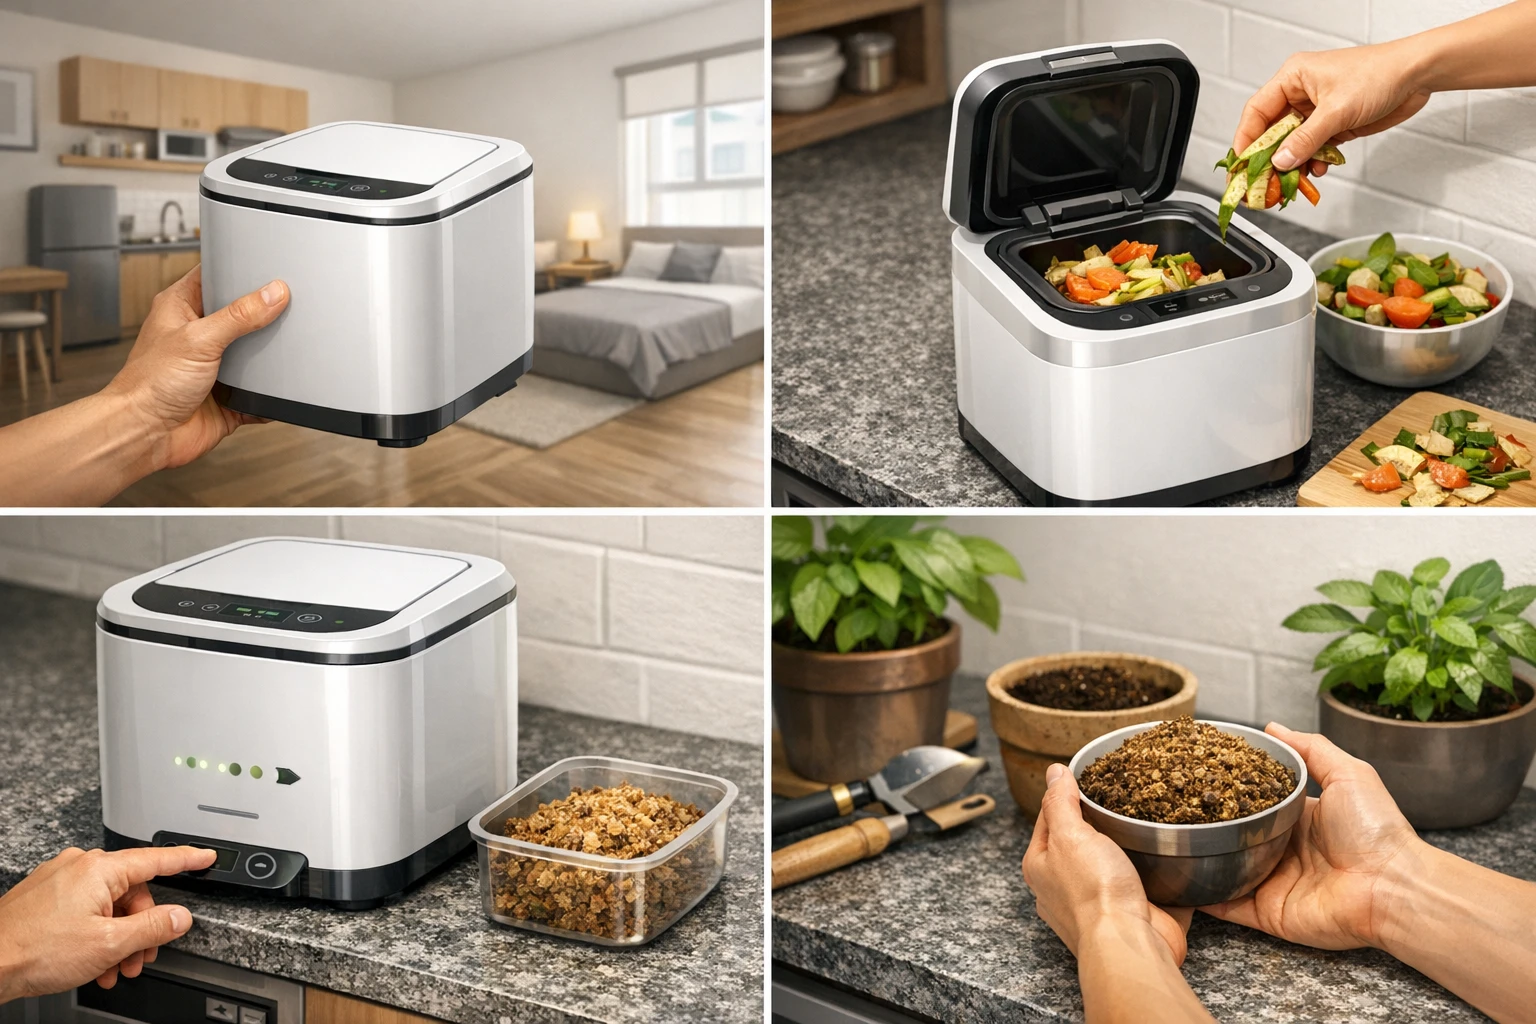
Living in a studio apartment often means limited counter space, shared waste collection, and a desire to keep the living area odor‑free. This guide explains how to select a compact electric food‑waste recycler that fits a small footprint, how to install it safely, and how to operate it so that kitchen scraps become useful fertilizer. By the end of the article, readers will understand the key criteria for choosing a device, the step‑by‑step setup process, and best‑practice tips that maximise efficiency while minimising noise and smell.
What You’ll Need
- One compact electric food‑waste recycler (see recommendations below)
- Power outlet within reach of the countertop
- Reusable collection bag or container for the finished compost
- Basic cleaning supplies (mild dish soap, soft brush)
- Optional: carbon filter replacement (provided with most units)
Below are four vetted products that meet the space and performance requirements of a studio apartment. The first mention of each product includes a direct affiliate link.
- Kissair Electric Kitchen Composter – $229.99, 4.3/5 stars (34 reviews)
- Food Cycler Eco 3 – $399.99, 4.5/5 stars (147 reviews)
- Airthereal Revive – $189.99, 4.7/5 stars (32 reviews)
- Airthereal Revive R500 – $179.99, 4.2/5 stars (792 reviews)
Step‑by‑Step Instructions
Step 1: Measure Your Available Space
Before purchasing, measure the width, depth, and height of the countertop or cabinet shelf where the recycler will sit. A typical studio kitchen provides 12‑15 inches of depth and 24‑30 inches of width. The Kissair Electric Kitchen Composter measures approximately 13" × 9" × 12", making it a snug fit for most narrow counters. The Food Cycler Eco 3 is slightly taller at 13" but maintains a narrow footprint (9" × 11"). Both devices are designed for countertop placement without obstructing nearby appliances.
Step 2: Choose the Appropriate Capacity
Capacity determines how often you will need to run the recycler. For a single‑person studio, a 2.5‑liter unit such as the Kissair or the Airthereal Revive is sufficient for daily vegetable peels, coffee grounds, and small fruit scraps. If you frequently host dinner parties or share meals with a roommate, the 3.5‑liter Food Cycler Eco 3 provides extra buffer, reducing the need for multiple cycles per day.
Step 3: Position and Plug In the Unit
Place the recycler on a stable, heat‑resistant surface. Ensure the power cord can reach a grounded outlet without stretching. Both the Kissair and Revive models feature low‑noise motors (48 dB for Kissair, comparable for Revive) that will not disturb a quiet studio environment. The Eco 3 operates at a similar noise level, described as “dishwasher‑like,” which is acceptable for open‑plan living spaces.
Step 4: Load Food Waste Correctly
All four devices share a similar loading process: open the lid, add waste, close the lid, and select a processing mode. To avoid blade jams, follow these guidelines:
- Cut large items (e.g., carrot stalks, corn husks) into bite‑size pieces.
- Exclude hard bones larger than a chicken wing; the Airthereal Revive can handle small bones but recommends avoiding rib bones.
- Mix green (wet) scraps with brown (dry) materials such as shredded newspaper or paper towels to maintain a balanced moisture level.
The Kissair offers three modes—Quick, Standard, and Clean—each with low, medium, and high gear options, allowing you to tailor cycle length to the amount of waste. The Eco 3’s patented Vortech™ system can grind tougher items like avocado pits, but it still benefits from pre‑cutting.
Step 5: Select the Appropriate Cycle
For everyday use, the Standard mode on the Kissair or the default “One‑Touch” cycle on the Eco 3 provides a good balance between speed and thoroughness. If you need a rapid turnaround (e.g., before bedtime), the Quick mode on the Kissair reduces processing time to approximately 30 minutes, though the resulting compost may be slightly wetter. The Revive models feature a single‑button operation that automatically adjusts grinding time based on load weight, simplifying decision‑making for busy users.
Step 6: Collect and Store the Finished Compost
After the cycle completes, the unit will emit a low‑pitch beep. Open the lid and use the provided collection bag or a small airtight container to store the dry, powder‑like output. The Kissair’s high‑temperature processing ensures the compost is odorless and safe for indoor use. The Revive R500 advertises a four‑hour run time that yields a fine powder suitable for potting mixes. Store the compost in a cool, dry place until you are ready to blend it with garden soil.
Step 7: Clean the Unit Regularly
Even with auto‑clean functions, periodic manual cleaning extends the lifespan of the recycler. Remove the bucket, rinse with warm soapy water, and wipe the interior with a soft brush. Avoid submerging the motor housing. Replace the carbon filter (included with each purchase) every three to six months to maintain odor‑removal efficiency. The Revive models include two filter boxes, allowing one to remain in service while the other is cleaned.
Tips & Pro Tips
- Batch Your Scraps: Accumulate waste in a small bin throughout the day and run the recycler once nightly. This reduces the number of cycles and saves electricity.
- Mind the Moisture: Overly wet items (e.g., citrus peels) can increase humidity inside the unit. Pat dry with a paper towel before loading.
- Use the LED Display: The Kissair’s LED screen shows the current stage (grinding, drying, cooling), helping you estimate when the compost will be ready.
- Energy Considerations: The Eco 3 consumes roughly the same power as a ceiling fan. If you are on a tight energy budget, run the unit during off‑peak hours.
- Safety First: Never place hands inside the bucket while the motor is running. The blades are designed to be “shark‑sharp” for efficiency but can cause injury.
Troubleshooting
| Problem | Possible Cause | Solution |
|---|---|---|
| Unit does not start | Power cord not fully inserted or outlet switched off | Check the plug, ensure the outlet is live, and press the start button firmly. |
| Excessive odor | Carbon filter saturated or waste too wet | Replace the filter and dry wet items before loading. |
| Blade jam | Large, uncut items or too many fibrous materials | Remove the jammed material, cut larger pieces, and run a short “Clean” cycle. |
| Compost remains wet | Imbalanced green‑to‑brown ratio | Add dry brown material (paper towels, shredded newspaper) and re‑run a short cycle. |
Conclusion
Choosing a compact electric food‑waste recycler for a studio apartment involves balancing space, capacity, noise level, and odor control. The Kissair Electric Kitchen Composter excels in low noise and multi‑mode flexibility, while the Food Cycler Eco 3 offers a sleek design and powerful grinding system for heavier loads. The Airthereal Revive provides rapid composting at a lower price point, and the Airthereal Revive R500 adds a durable aluminum bucket and quick four‑hour run time. By following the steps outlined above, studio dwellers can reduce landfill waste, keep their living space fresh, and create nutrient‑rich compost for indoor plants or balcony gardens.
Products Mentioned in This Guide
Frequently Asked Questions
What size should a compact electric food‑waste recycler be for a studio apartment?
Look for units under 12 inches wide and 10 inches tall so they fit on a small countertop without crowding the space.
How do I install a food‑waste recycler safely in a studio?
Place it near a reachable power outlet, plug it in, and follow the manufacturer’s instructions for securing the collection bag and any carbon filter.
Will a compact recycler cause a lot of noise or odor?
Most models include noise‑dampening insulation and a carbon filter to keep sound and smells minimal when used correctly.
What regular maintenance does a studio‑friendly recycler need?
Empty the compost container after each use, clean the grinding chamber with mild soap and a soft brush, and replace the carbon filter as recommended (usually every 3‑6 months).
Can the compost produced be used for indoor plants?
Yes, the finished compost is safe for houseplants and can be mixed with potting soil to improve nutrient content.