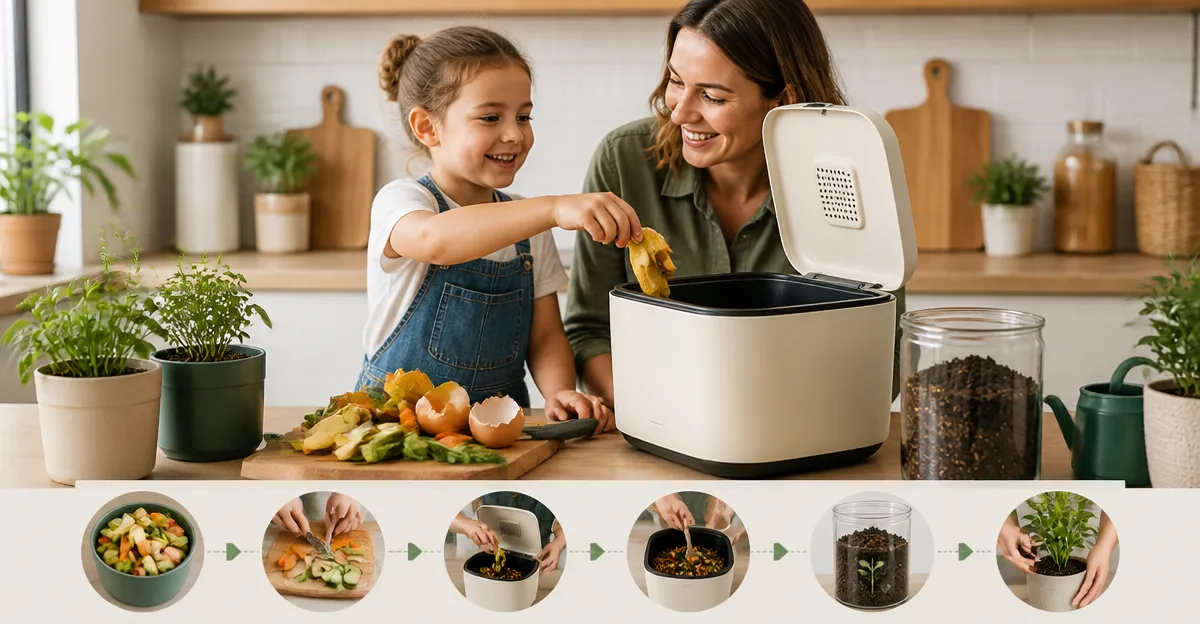
How to Compost with Kids Using a Countertop Composter: 10 Easy, Fun Indoor Activities
Introduction
This guide explains how a family can turn everyday kitchen scraps into valuable compost while teaching children the principles of waste reduction, soil health, and responsibility. The reader will learn ten structured activities that combine hands‑on learning with simple tools. By following the steps, parents can create a safe, odor‑free compost station that fits on a kitchen counter and can be used by children of various ages. The approach emphasizes educational value, environmental impact, and the enjoyment of shared household projects.
What You Will Need
- A countertop compost bin or electric composter (see product recommendations below)
- Reusable collection containers such as small baskets or zip‑lock bags
- Kid‑friendly labels or stickers for sorting
- A dry material source (e.g., shredded newspaper, cardboard strips)
- Protective gloves for older children
- A simple chart or calendar for tracking progress
Step‑by‑Step Instructions
1. Set Up the Compost Station
Begin by selecting a stable spot on the countertop where the compost bin will remain undisturbed. The chosen location should be near the food preparation area but away from direct heat sources. For families that prefer a non‑electric solution, the Epica Countertop Compost Bin provides an airtight lid and a replaceable activated‑charcoal filter that eliminates odors naturally. This bin is constructed from high‑grade stainless steel, costs $29.98, and holds a 1.3‑gallon capacity. It has a rating of 4.6 out of 5 stars based on 20,853 reviews, indicating strong reliability. The filter lasts for six months, reducing the need for frequent replacement.
Place a small tray underneath the bin to catch any accidental drips, and ensure the bin is level. Explain to the children that the bin will act as a temporary home for food scraps before they become soil amendment.
2. Teach the Basics of Food Waste
Gather the children and discuss the difference between compostable and non‑compostable items. Use simple language: fruit peels, vegetable cores, coffee grounds, and eggshells can be composted, whereas plastic, metal, and dairy products should not. Provide visual examples by showing a few items and asking the children to categorize them. Reinforce the lesson with a short story about how worms and microbes break down organic matter into nutrient‑rich humus.
At this stage, no product is required beyond the compost bin already installed.
3. Create a Scrap Collection Game
Turn the act of gathering scraps into a timed challenge. Provide each child with a small, colorful basket labeled "Compost". Set a timer for five minutes and encourage the children to collect as many eligible scraps as possible while preparing a meal. After the timer ends, review the collected items together and place them into the Epica Countertop Compost Bin. Celebrate the effort with a sticker reward. This activity builds habit formation and makes the process enjoyable.
4. Build a Compost Timeline Chart
Design a simple wall‑mounted chart that tracks the daily addition of scraps and the expected decomposition time. Use a three‑column layout: "Date", "Scrap Type", and "Observation". Encourage the children to write a brief note each day about any smells, color changes, or texture differences. Over a month, the chart will illustrate the gradual transformation of waste into dark, crumbly material. The visual progress reinforces the concept of patience and natural cycles.
5. Introduce a Filtered Countertop Bin for Larger Families
If the household generates a higher volume of scraps, the Utopia Kitchen Compost Bin offers a comparable 1.3‑gallon capacity with a sleek stainless‑steel design. Priced at $26.99 and rated 4.5 out of 5 stars from 20,077 reviews, this bin includes a charcoal filter that traps odors naturally. The Utopia model is noted for its sturdy construction and easy cleaning, making it suitable for families that need to empty the bin more frequently. Explain to the children that the charcoal filter works like a sponge for smell molecules, keeping the kitchen fresh.
6. Use an Electric Composter for Rapid Results
For families that desire faster turnover, the Reencle Prime Electric Composter can transform up to 2.2 lb of food waste into compost in as little as two hours. This model costs $499.00, carries a rating of 4.4 out of 5 stars based on 366 reviews, and includes a three‑layer filter system that eliminates odors. Its whisper‑quiet operation (as low as 28 dB) ensures that children are not disturbed during bedtime. The device also comes with a carbon filter, starter pack, and shovel, providing a complete starter kit. Explain that the electric unit creates an aerobic environment, which means oxygen is supplied to microbes, accelerating decomposition.
Allow the children to press the single button to start a cycle after the bin is filled. Observe the digital timer together and discuss how temperature and airflow affect the process.
7. Explore the Airthereal R500 for Compact Spaces
The Airthereal R500 Electric Composter offers a 2.5‑liter capacity and a four‑hour cycle, making it ideal for smaller kitchens. Priced at $159.99 with a rating of 4.2 out of 5 stars from 729 reviews, it features a SHARKSDEN Trinity Blade that crushes food waste efficiently. The unit includes biodegradable carbon filters to reduce odors and a cast‑aluminum bucket that is dishwasher safe. This model is especially useful for children who enjoy watching the transformation because the process is visible through the transparent lid. Emphasize safety by supervising the button press and ensuring the unit is placed on a heat‑resistant surface.
8. Upgrade to the Airthereal R500‑V for Visual Feedback
For families that appreciate real‑time observation, the Airthereal R500‑V Electric Composter adds a glass cover that allows children to watch the composting cycle. This version costs $179.99, holds a 2.5‑liter capacity, and has a rating of 4.5 out of 5 stars from 205 reviews. The upgraded SHARKSDEN Tri‑Blade provides superior cutting power, and the biodegradable carbon filter maintains a virtually odor‑free environment. A three‑year warranty (including an extra 1.5 years for Amazon customers) offers peace of mind. Demonstrate how the visual cover works by starting a cycle and pointing out the gradual change from wet scraps to dry powder.
9. Conduct a Soil Enrichment Experiment
After a week of collecting compost, allow the material to mature for an additional two weeks in a separate container. Then mix a small amount of the finished compost with potting soil in a clear pot. Invite the children to plant fast‑growing seeds such as radishes or lettuce. Record germination rates and compare them with a control pot that uses only regular soil. Discuss how the nutrients in compost improve plant health, reinforcing the practical benefits of their kitchen activity.
10. Celebrate with a Compost‑Themed Art Project
Conclude the series of activities by creating artwork that reflects the composting journey. Provide recycled paper, crayons, and stickers that depict leaves, worms, and soil layers. Encourage each child to illustrate the path from kitchen scrap to garden enrichment. Display the finished pieces near the compost station as a reminder of the family’s commitment to sustainability.
Tips & Pro Tips
- Always keep a dry material (e.g., shredded newspaper) on hand to balance moisture levels in the bin.
- Replace charcoal or carbon filters according to the manufacturer’s schedule to maintain odor control.
- Teach children to rinse fruit peels lightly before placing them in the bin to reduce excess moisture.
- For electric units, run a short cycle with an empty bucket after cleaning to clear residual debris.
- Use a timer or kitchen alarm to remind older children when it is time to start a compost cycle.
Troubleshooting
| Problem | Possible Cause | Solution |
|---|---|---|
| Persistent odor | Insufficient dry material or overdue filter change | Add shredded newspaper and replace the charcoal/carbon filter. |
| Compost not breaking down | Too many high‑moisture items such as dairy or cooked pasta | Remove wet items, add dry material, and ensure proper aeration. |
| Electric unit stops mid‑cycle | Overload or jammed blade | Turn off, empty the bucket, and gently dislodge any stuck pieces before restarting. |
Conclusion
By following these ten activities, families can integrate composting into daily routines while providing children with hands‑on environmental education. The guide demonstrates how a simple countertop bin or an advanced electric composter can serve as the centerpiece of a fun, educational experience. Consistent practice leads to reduced household waste, richer garden soil, and a stronger sense of stewardship among young participants. Parents are encouraged to adapt the activities to their own schedules and to celebrate each milestone along the composting journey.
Products Mentioned in This Guide
Frequently Asked Questions
What age is appropriate for kids to use a countertop compost bin?
Most countertop composters are safe for children aged 5 and up, with supervision for younger kids during handling of scraps and tools.
How can I prevent odors when composting indoors with kids?
Add plenty of dry material like shredded newspaper, keep the bin sealed between additions, and stir gently each day to aerate.
Which kitchen scraps are safe to put in a countertop composter?
Fruit and vegetable peels, coffee grounds, tea bags, and eggshells are ideal; avoid meat, dairy, and oily foods.
What simple tools help kids sort waste for composting?
Use kid‑friendly labels or stickers on small baskets or zip‑lock bags to separate greens from browns before adding them to the bin.
How often should the compost be maintained to keep it kid‑friendly?
Stir or shake the bin once a day and check the moisture level weekly, adding dry material if it feels soggy.