Introduction
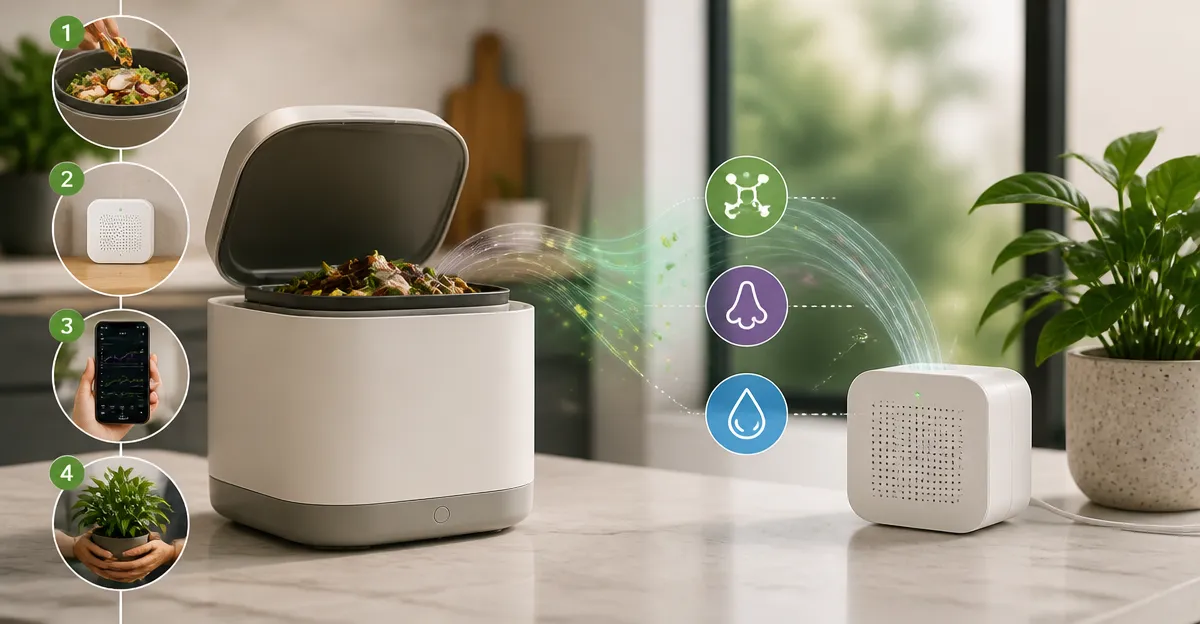
This guide explains how one can monitor emissions from a countertop composter using indoor air sensors. It demonstrates why accurate detection of volatile organic compounds (VOCs), odors, and moisture is essential for indoor health and compost efficiency. The reader will learn a systematic approach that combines sensor placement, calibration, data logging, and interpretation. By following the steps, one can protect occupants, maintain a pleasant kitchen environment, and optimise compost performance.
What You'll Need
- A reliable indoor air quality monitor such as the Zemeollo Air Quality Monitor or an alternative listed below.
- A stable power source or rechargeable battery for continuous operation.
- A smartphone or tablet with internet access for app‑based data review.
- Basic tools for positioning the sensor (adhesive strips, small stand, or magnetic mount).
Step 1: Position the Sensor Near the Compost
The first step is to place the sensor at a distance of 30‑45 centimeters from the compost container. This distance captures emissions without exposing the device to splashes or excessive humidity. The Zemeollo Air Quality Monitor is useful because it measures CO₂, TVOC, formaldehyde, and particulate matter with an error margin of less than ±5%. Its portable design and 20‑hour battery life allow placement on a countertop without permanent wiring. The high‑definition color screen provides immediate visual feedback, enabling quick verification of proper positioning.
Secure the device using the included magnetic base or a small piece of 3M Command strip. Ensure that the sensor is not obstructed by utensils or decorative items that could block airflow. A stable position reduces data variance caused by drafts from kitchen fans. After placement, press and hold the power button for three seconds to activate continuous detection.
Step 2: Calibrate the Device for Accurate Readings
Calibration guarantees that the sensor reports values that reflect true indoor conditions. The Zemeollo unit performs an automatic self‑calibration on first power‑up, but a manual verification is advisable after the first week of use. Open the companion app, navigate to the calibration menu, and select the “Auto‑Calibrate” option while the kitchen is unoccupied and windows are closed. This process aligns the baseline CO₂ and TVOC levels with the ambient environment.
If one prefers an Alexa‑integrated solution, the Amazon Smart Air Quality Monitor offers a seamless setup through the Alexa app. It tracks five key factors, including VOCs and CO, and can trigger Alexa routines when thresholds are exceeded. The device’s color‑coded LED provides an at‑a‑glance status, and the integration with voice assistants simplifies calibration through spoken commands.
Step 3: Record Baseline Readings Before Adding Compost
Before the compost begins to decompose, record a 24‑hour baseline of temperature, humidity, CO₂, and TVOC levels. This baseline serves as a reference point for later comparisons. Use the app’s data export feature to download a CSV file; the Zemeollo monitor stores up to 13 days of data, while the GoveeLife model offers two‑year storage for long‑term analysis.
During the baseline period, keep kitchen doors and windows in their typical configuration. Avoid cooking activities that generate steam or smoke, as these could skew the baseline. Once the baseline is established, note the average values in a simple spreadsheet for future reference.
Step 4: Monitor VOCs and Odors During Active Composting
As the compost breaks down, VOCs such as ethanol, acetaldehyde, and formaldehyde may be released, creating noticeable odors. The Zemeollo Air Quality Monitor detects TVOC and formaldehyde with high precision, displaying real‑time values on its HD LED screen. When the screen changes color to yellow or red, the user knows that emissions have crossed safe thresholds.
For users who desire automated alerts, the Amazon Smart Air Quality Monitor can send push notifications to a smartphone or announce warnings through Echo devices. By configuring a routine that turns on a kitchen exhaust fan when VOC levels exceed a preset limit, one can mitigate odors without manual intervention. This automation leverages the monitor’s ability to communicate with compatible smart plugs and fans.
Step 5: Manage Moisture Levels to Prevent Mold
Excess moisture in a countertop compost can lead to mold growth, which may release additional spores and mycotoxins. Both the Zemeollo and GoveeLife monitors include humidity sensors; the GoveeLife device reports humidity with an accuracy of ±3%RH and updates every two seconds. Continuous humidity monitoring enables the user to adjust the compost’s water content or increase ventilation.
If humidity consistently exceeds 70%, consider adding a small desiccant packet to the compost container or increasing airflow with a low‑speed fan. The GoveeLife monitor can trigger a Govee smart fan through its Wi‑Fi integration, automatically maintaining optimal humidity without constant user oversight.
Step 6: Analyse Data and Adjust Composting Practices
After a week of operation, export the collected data from the chosen sensor’s app. Compare the VOC and humidity trends against the baseline. A gradual rise in TVOC coupled with stable temperature suggests that the compost is active but not producing harmful concentrations. Conversely, sharp spikes indicate over‑watering or insufficient ventilation.
Based on the analysis, adjust the compost mixture by adding more carbon‑rich material (e.g., shredded newspaper) to balance nitrogen sources. If VOC spikes persist, increase the frequency of stirring or relocate the compost to a better‑ventilated spot. Document each adjustment and continue monitoring for at least two additional weeks to confirm the effectiveness of the changes.
Tips & Pro Tips
- Place the sensor at the same height as the compost surface to capture emissions that rise with warm air.
- Enable data logging on a daily schedule to avoid gaps caused by power interruptions.
- Use the Aranet4 Home Air Quality Monitor for precise CO₂ tracking if the primary concern is ventilation rather than VOCs. Its e‑ink display consumes minimal power and provides up to four years of battery life.
- When using the Temtop Air Quality Monitor, remember that its laser particle sensor offers reliable PM2.5 data, which can be useful if the compost produces visible dust.
- Regularly clean the sensor’s inlet vents with a soft brush to prevent dust buildup that could affect accuracy.
Troubleshooting
Problem: Sensor reports constant high VOC levels even when the compost is idle.
Solution: Verify that the kitchen ventilation system is not recirculating stale air. Relocate the sensor away from the range hood and ensure that the device’s firmware is up to date.
Problem: Battery drains rapidly on a portable monitor.
Solution: Reduce the data refresh rate in the app settings, or connect the device to a permanent power source using the supplied USB cable.
Conclusion
This guide has outlined a systematic method for monitoring emissions from a countertop composter using indoor air quality sensors. By selecting an appropriate device, positioning it correctly, calibrating, establishing a baseline, and analysing ongoing data, one can maintain a healthy indoor environment while enjoying the benefits of composting. The recommended products provide accurate measurements, automation capabilities, and long‑term data storage, making them valuable tools for any household.
Products Mentioned in This Guide
Frequently Asked Questions
What type of indoor air sensor is best for detecting compost emissions?
A sensor that measures VOCs, formaldehyde, and humidity, such as the Zemeollo Air Quality Monitor, provides comprehensive coverage.
How far should the sensor be placed from a countertop composter?
Position the sensor 30‑45 cm away to capture emissions without being overloaded by moisture.
Do I need to calibrate the sensor before use?
Yes, run the sensor’s auto‑calibration routine for at least 24 hours in a clean environment to establish a baseline.
Can I view the data on my smartphone?
Most monitors sync via Bluetooth or Wi‑Fi to an app, allowing real‑time graphs and alerts on any mobile device.
What alerts should I set for safe compost operation?
Configure warnings for VOC spikes above 200 ppb or humidity over 70 % to address odor or mold risks promptly.