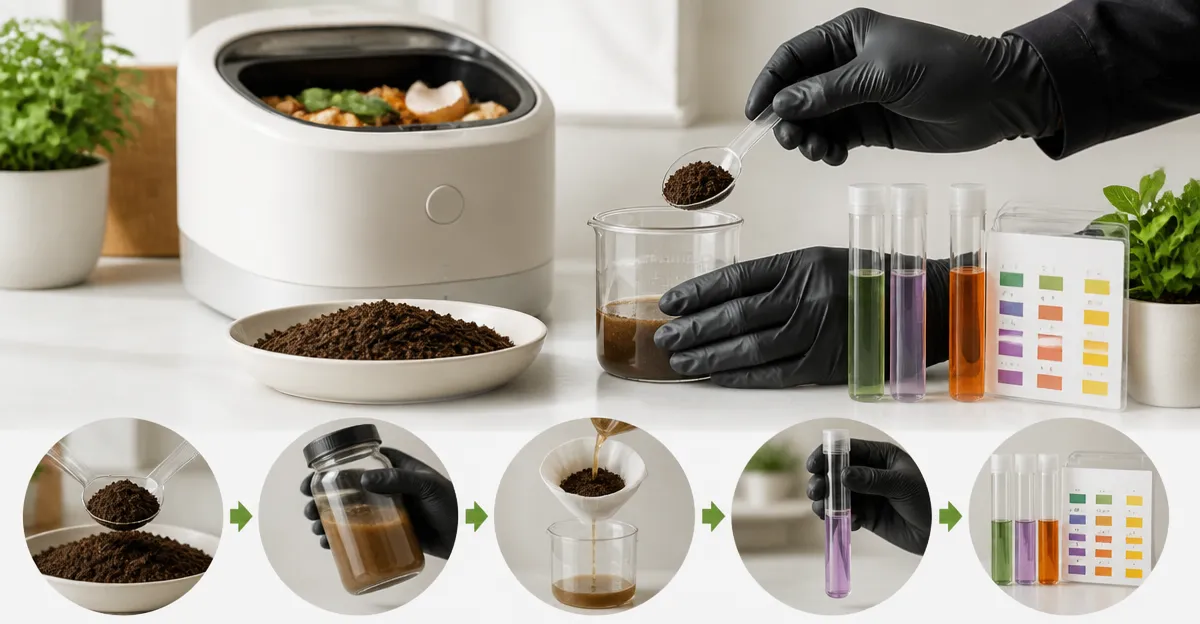
How to Test NPK of Processed Compost from Your Countertop Composter: A Simple DIY Home Guide
Introduction
Understanding the nitrogen (N), phosphorus (P), and potassium (K) content of your processed compost is essential for creating balanced soil amendments. This guide will teach the reader how to collect a representative sample, conduct microbial and chemical analyses, and interpret the results to optimise plant health. By following the steps, one can avoid over‑fertilisation, reduce waste, and achieve higher yields from garden beds, container plants, or indoor herb gardens.
The methodology combines low‑cost at‑home tools with a professional‑grade laboratory service, providing both rapid insights and precise nutrient data. The reader will learn why each tool is selected, how to use it correctly, and what actions to take based on the findings.
Although the guide recommends specific products, the principles remain applicable with alternative equipment. The emphasis is on practicality, scientific rigour, and reproducibility for the intermediate gardener who wishes to manage compost quality with confidence.
Each section is organised as a clear, numbered step, allowing the reader to progress methodically from sample collection to final interpretation.
What You'll Need
- Clean plastic container for sample collection (1 L capacity)
- Stainless‑steel kitchen scale (accuracy ±1 g)
- Distilled water for dilution
- Rapitest Microbial Soil Test Kit – for rapid microbial activity assessment
- Soil Genie Professional Soil Test Kit – for comprehensive NPK and pH analysis
- Auduto 7‑in‑1 Soil Tester – for on‑site pH, moisture, and temperature checks
- Protective gloves and safety glasses
- Notebook or digital spreadsheet for recording results
Step‑by‑Step Instructions
Step 1: Collect a Representative Compost Sample
Begin by turning the compost bin and selecting material from three different zones: the top layer, the middle, and the bottom. Using the clean plastic container, scoop approximately 200 g from each zone, combine them, and mix thoroughly. This composite sample minimises variability caused by moisture gradients or nutrient hotspots.
Weigh the mixed sample on the kitchen scale and record the exact mass. Accurate weighting is crucial because the subsequent nutrient calculations rely on a known sample weight.
If the compost feels excessively dry, lightly mist it with distilled water and allow it to equilibrate for 15 minutes before proceeding. This step ensures that moisture‑dependent tests, such as the Auduto meter, provide reliable readings.
Store the remaining compost in a sealed bag at room temperature if testing will be delayed beyond 24 hours.
Step 2: Prepare the Sample for Testing
Divide the composite sample into three portions, each dedicated to a specific testing method. For the Rapitest microbial assay, place 5 g of compost into the provided test vial, following the kit's quick‑start sheet. For the Soil Genie laboratory analysis, fill the pre‑paid return envelope with 50 g of compost, seal, and label as instructed. Finally, set aside a small amount (approximately 30 g) for the Auduto handheld tester.
Label each portion clearly to avoid cross‑contamination. Use a permanent marker and write the date, sample source, and intended test (e.g., “Microbial – Rapitest”).
When handling the sample, wear gloves and glasses to protect against dust and potential pathogens that may be present in raw compost.
These preparation steps create a clean workflow and ensure that each tool receives the appropriate amount of material.
Step 3: Assess Microbial Activity with Rapitest Microbial Soil Test Kit
The Rapitest kit offers a smartphone‑guided, app‑based analysis that delivers results within ten minutes. After adding the supplied reagent to the test vial, shake gently and place the vial on the phone's camera as instructed. The app interprets the colour change and provides a microbial biomass index.
Why this product? It eliminates the need for expensive laboratory microbiology services, provides immediate feedback, and integrates with iPhone or Android devices for data storage. At $24.99, the kit includes five tests, making it cost‑effective for repeated compost monitoring.
Key features include:
- Smartphone‑guided testing with unlimited app usage
- Results in 10 minutes
- All components for five tests included
- 4.5‑star rating from 11 reviewers
Record the microbial index in your notebook. High microbial activity typically correlates with well‑decomposed compost and indicates that nutrient mineralisation will be efficient when applied to soil.
Step 4: Conduct Full Nutrient Analysis with Soil Genie Professional Soil Test Kit
The Soil Genie kit sends a sample to a certified laboratory that analyses twelve essential nutrients, including N, P, K, secondary nutrients, and micronutrients, as well as pH. After sealing the sample in the prepaid envelope, drop it in the mailbox. Within six to eight days, you will receive a digital report detailing exact nutrient concentrations (e.g., 1.2 % N, 0.5 % P₂O₅, 1.0 % K₂O).
Why this product? It provides lab‑grade accuracy that cannot be matched by inexpensive at‑home kits, while still being convenient for home gardeners. The price of $34.99 includes shipping, and the 4.8‑star rating from six reviewers reflects reliability.
Key features include:
- Tests 12 nutrients plus pH
- Prepaid return shipping
- Professional report delivered digitally in 6‑8 days
- Tailored amendment recommendations
When the report arrives, compare the measured NPK values to the target ratios for your intended planting (e.g., 3‑1‑2 for leafy greens). This comparison will guide you in adjusting the compost before application.
Step 5: Verify pH and Moisture with Auduto 7‑in‑1 Soil Tester
The Auduto device provides on‑site measurements of soil pH, moisture, temperature, and even sunlight intensity. Insert the metal probe into the prepared portion of compost to a depth of two‑thirds of the probe length, avoiding excessive force. The LCD display will show pH (0‑14 scale), moisture percentage, and temperature in Celsius or Fahrenheit.
Why this product? It consolidates multiple parameters into a single handheld unit, saving time and eliminating the need for separate meters. At $24.99, it offers good value, and the 4.5‑star rating from 75 reviewers confirms durability.
Key features include:
- 7‑in‑1 measurement (pH, moisture, temperature, humidity, sunlight, etc.)
- Patented metal probes for fast, accurate readings
- LCD display for immediate results
- Suitable for indoor and outdoor applications
Record the pH and moisture values. Ideal compost pH typically ranges from 6.0 to 7.0; values outside this range may require lime (to raise) or elemental sulphur (to lower) before field application.
Step 6: Interpret Results and Adjust Your Compost
Combine the data from all three tools:
- Microbial index from Rapitest – indicates biological readiness.
- Lab‑grade NPK values from Soil Genie – provide exact nutrient percentages.
- pH and moisture from Auduto – show chemical balance and water content.
If the microbial index is low, consider extending the composting period or adding a nitrogen‑rich amendment such as shredded newspaper or kitchen vegetable scraps. If N is excessive relative to P and K, blend the compost with carbon‑rich material (e.g., wood chips) to dilute nitrogen and improve the C:N ratio.
Adjust pH as needed: add horticultural lime at 1 lb per 100 sq ft to raise pH by approximately 0.5 units, or apply elemental sulphur at a similar rate to lower pH. Re‑test after 48 hours to confirm the adjustment.
Finally, store the optimised compost in breathable bags or containers to preserve its structure until planting.
Tips & Pro Tips
- Perform testing at the same time of year to track seasonal changes in compost quality.
- Use distilled water for all dilutions to avoid introducing extraneous minerals.
- When using the Auduto meter, calibrate the pH sensor monthly with standard buffer solutions (pH 4, 7, 10).
- Document each test with photos of the app results; this visual record aids future comparisons.
- For large‑scale composters, scale the sample size proportionally while maintaining the same weight‑to‑volume ratios.
Troubleshooting
| Problem | Possible Cause | Solution |
|---|---|---|
| Rapitest colour does not change | Insufficient moisture or expired reagent | Add a few drops of distilled water, ensure the kit is stored in a cool, dry place, and replace if past expiration date. |
| Soil Genie report shows “Insufficient Sample” | Sample weight below required minimum | Collect at least 50 g of compost, pack firmly but without compacting, and resend. |
| Auduto displays “Error” for pH | Probe contaminated or not fully inserted | Rinse probe with distilled water, dry, and insert to the recommended depth. |
Conclusion
Testing the NPK of processed compost from a countertop composter is achievable with a combination of rapid at‑home tools and a professional laboratory service. By following the six steps, the reader gains insight into microbial health, precise nutrient composition, and critical pH and moisture levels. Armed with this information, one can make informed amendments, avoid over‑fertilisation, and maximise the benefits of homemade compost for any growing environment.
Regular testing, coupled with the recommended products, transforms compost management from guesswork into a science‑based practice, leading to healthier plants and more sustainable gardening.
Products Mentioned in This Guide
Frequently Asked Questions
How do I collect a representative sample of compost for NPK testing?
Mix the compost thoroughly, then take several small portions from different spots and combine them into one homogenised sample.
What low‑cost tools can I use at home to estimate NPK levels?
A simple soil test kit or color‑change strips can give a rough N, P, K estimate before sending a sample to a lab.
When should I send my compost to a professional laboratory?
Send a sample when you need precise nutrient data for detailed fertilisation plans or when home kits give inconsistent results.
How can I interpret NPK results to avoid over‑fertilisation?
Compare the measured NPK ratios to the needs of your plants; lower nitrogen or potassium values suggest reducing application rates.
What actions should I take if my compost is deficient in phosphorus?
Incorporate a phosphorus‑rich amendment such as bone meal or rock phosphate until the desired P level is reached.