How to Fix Countertop Composter Error Codes and Jams: Step‑by‑Step Troubleshooting & Prevention Tips
Introduction
This guide explains how to diagnose and resolve common error codes and mechanical jams that occur in countertop composters. Readers will learn systematic inspection techniques, corrective actions, and preventive habits that extend the life of their composting equipment. The information is valuable because a malfunctioning bin can produce unpleasant odors, attract pests, and disrupt sustainable kitchen practices. By following the procedures outlined herein, one can maintain a hygienic and efficient composting workflow without unnecessary expense.
What You'll Need
- Soft microfiber cloths for cleaning
- Warm soapy water
- Rubber gloves
- Replacement carbon filter (if applicable)
- Adjustable screwdriver set
Optional tools include the Epica Countertop Compost Bin for testing filter performance and the Joseph Joseph Easy‑Fill Compost Bin for comparing lid mechanisms.
Step‑by‑Step Instructions
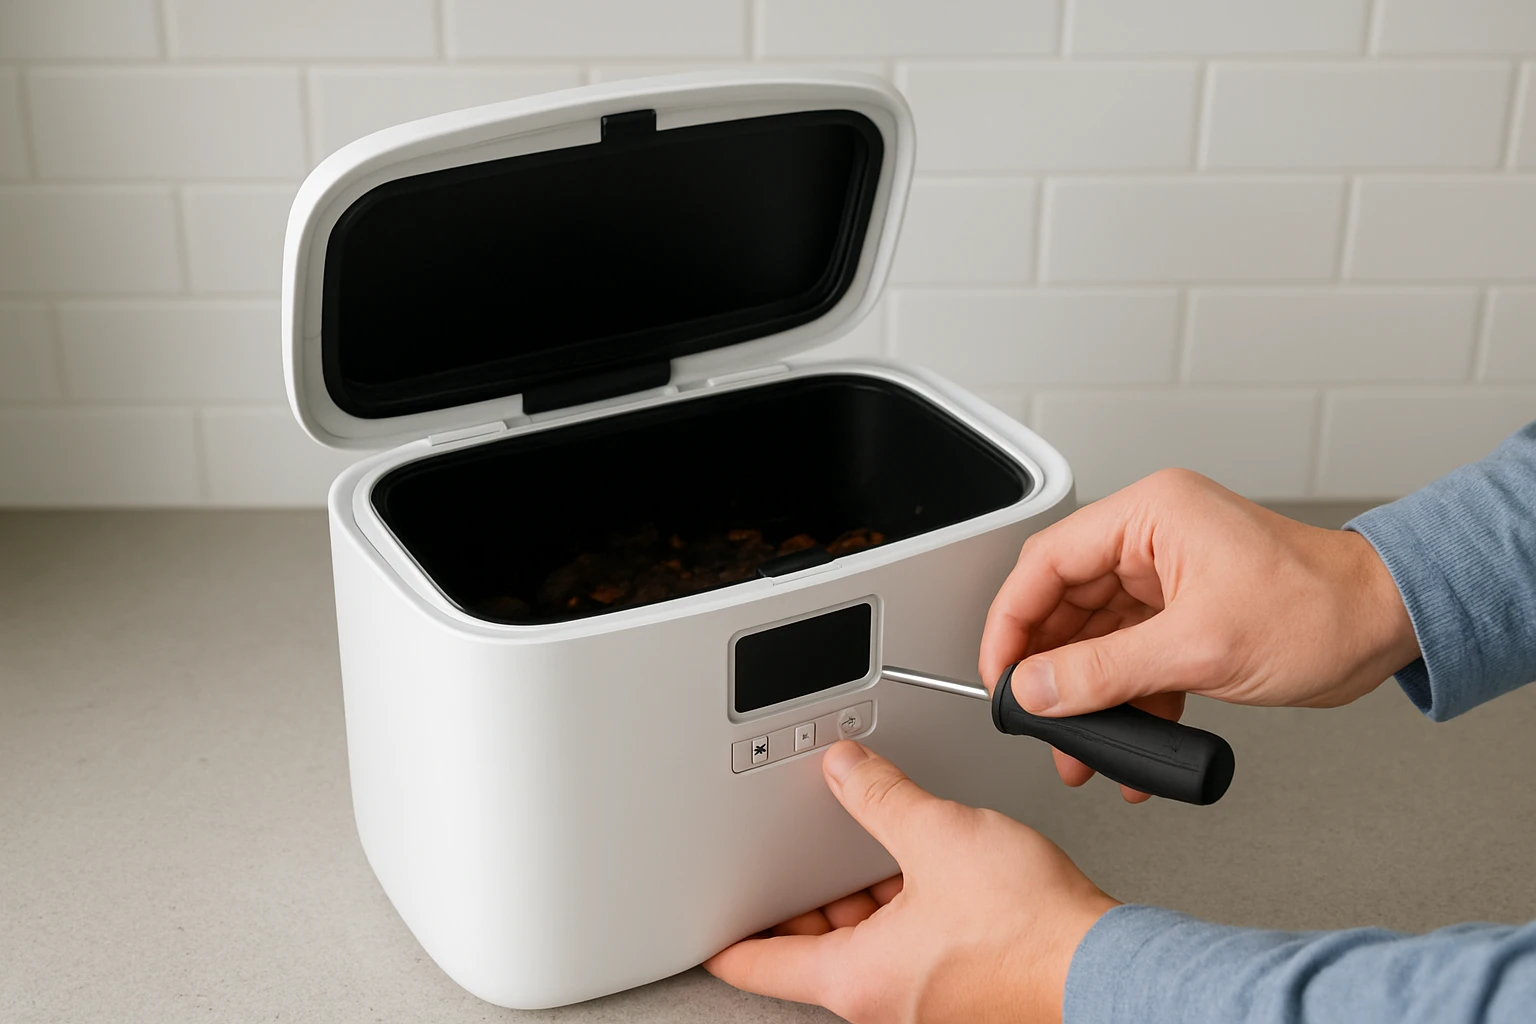
Step 1: Identify the Error Code
Most modern countertop composters display a numeric or alphanumeric code on the lid or base. Record the code exactly as shown, then consult the manufacturer's manual for its definition. If the manual is unavailable, a quick online search using the model name often yields a PDF guide. Understanding the code prevents unnecessary disassembly and focuses the repair on the affected subsystem.
Step 2: Power Cycle the Unit
Many error codes are transient and result from a temporary sensor glitch. Unplug the unit, wait thirty seconds, and plug it back in. Observe whether the code clears after the reset. If the code persists, proceed to the next step.
Step 3: Inspect the Lid Seal and Filter
A common cause of odor‑related error codes is a compromised airtight seal. Open the lid and examine the rubber gasket for cracks or deformation. Replace the gasket if it shows wear. For bins equipped with an activated‑charcoal filter, such as the Epica Countertop Compost Bin, remove the filter and inspect it for saturation. The filter should be replaced every six months; a saturated filter can trigger a “filter‑error” code.
Product details: Stainless‑steel construction, 1.3‑gallon capacity, 4.7‑star rating from over 20,000 reviews, priced at $27.98.
Step 4: Clear Mechanical Jams
Jams typically occur when food scraps become compacted near the discharge opening. Wear rubber gloves and gently tap the sides of the bin to loosen any adhered material. If the jam persists, use a soft plastic tool to pry the inner bucket away from the outer shell. Do not use metal instruments, as they may damage the stainless‑steel surface.
Step 5: Clean the Interior and Exterior
Mix warm water with a mild dish detergent and soak a microfiber cloth. Wipe the interior walls, lid, and any moving parts. For stubborn residues, a solution of one tablespoon baking soda per liter of water works effectively without corroding metal. Rinse with a clean damp cloth and allow the bin to air‑dry before reassembly.
Step 6: Verify Airflow Mechanisms
The Joseph Joseph model incorporates an adjustable air vent that regulates moisture. Ensure the vent is set to the “open” position during cleaning to allow fresh air to circulate. After cleaning, close the vent if you prefer a tighter seal. Proper airflow reduces bacterial growth, which can otherwise generate error codes related to humidity.
Product details: Adjustable air vent, 1‑gallon capacity, 4.6‑star rating from 3,810 reviews, priced at $18.72.
Step 7: Reassemble and Test
Once all components are clean and dry, reinsert the inner bucket, replace the filter (if applicable), and close the lid securely. Plug the unit back in and observe for at least five minutes. The error code should be cleared, and the bin should operate silently. Record the time of the next scheduled maintenance in a kitchen log.
Tips & Pro Tips
- Empty the bin daily to prevent excessive moisture buildup, which is a frequent cause of odor codes.
- Rotate the carbon filter every four to six months; this extends the life of the seal and maintains odor control.
- Use compostable liners that fit the bin dimensions; oversized liners can trap air and cause pressure warnings.
- Place the bin away from direct heat sources such as ovens or dishwashers to avoid sensor overheating.
Troubleshooting Common Problems
Problem: Persistent “Sensor Failure” Code
Cause: Dust accumulation on the moisture sensor. Solution: Power off the unit, locate the sensor (usually a small metal plate near the lid), and clean it gently with a cotton swab dipped in isopropyl alcohol.
Problem: Lid Won't Close Properly
Cause: Misaligned gasket or warped lid. Solution: Remove the lid, realign the gasket, and gently tap the lid back into place. If warping is evident, consider replacing the lid using the manufacturer's spare parts kit.
Problem: Unpleasant Odor Despite Filter Replacement
Cause: Food waste not broken down sufficiently. Solution: Add a thin layer of shredded newspaper or dry leaves to the bin to absorb excess moisture and accelerate decomposition.
Conclusion
By following the systematic steps outlined in this guide, one can resolve error codes, clear mechanical jams, and implement preventive habits that keep a countertop composter operating efficiently. Regular cleaning, timely filter replacement, and mindful loading are the cornerstones of reliable composting. Armed with these techniques, readers can continue to divert organic waste from landfills while maintaining a pleasant kitchen environment.
Products Mentioned in This Guide
Frequently Asked Questions
What do common error codes on a countertop composter indicate?
They usually signal issues such as a clogged filter, motor overload, or sensor malfunction, each represented by a specific numeric or alphanumeric code in the user manual.
How can I safely clear a jammed composting motor or blade?
Turn off and unplug the unit, remove the inner bin, use a soft cloth or tweezers to dislodge debris, then rotate the blade manually before reassembling.
How often should the carbon filter be replaced to avoid errors?
Replace the carbon filter every 3‑6 months, or sooner if you notice reduced odor control or a persistent error code related to airflow.
What routine cleaning steps help prevent odors and error codes?
Wipe the interior with warm soapy water weekly, clean the gasket and vent openings, and dry all parts before re‑installing to keep the system breathable.
Can using the wrong type of food waste cause error codes, and how do I avoid it?
Yes, high‑acid or oily foods can clog sensors and filters; stick to recommended vegetable scraps, coffee grounds, and fruit peels, and avoid meat, dairy, and oils.