How to Test Your Countertop Composter’s Processing Efficacy at Home: Quick DIY Steps to Measure Speed, Quality & Efficiency
Introduction
One will learn how to evaluate the speed, quality, and overall efficiency of a countertop composting system using simple household tools and scientifically sound methods. The guide explains why measuring processing efficacy is valuable for reducing waste, improving nutrient recovery, and optimizing composting conditions. It also highlights how accurate data can inform adjustments to moisture, aeration, and feedstock composition. By following the steps, one can obtain reliable metrics without specialized laboratory equipment.
What You'll Need
- Fresh kitchen waste (fruit peels, vegetable scraps, coffee grounds)
- Moisture meter or kitchen scale with measuring cup
- Thermometer (digital, range 0‑120°C)
- Timer or stopwatch
- pH test strips (optional, for quality assessment)
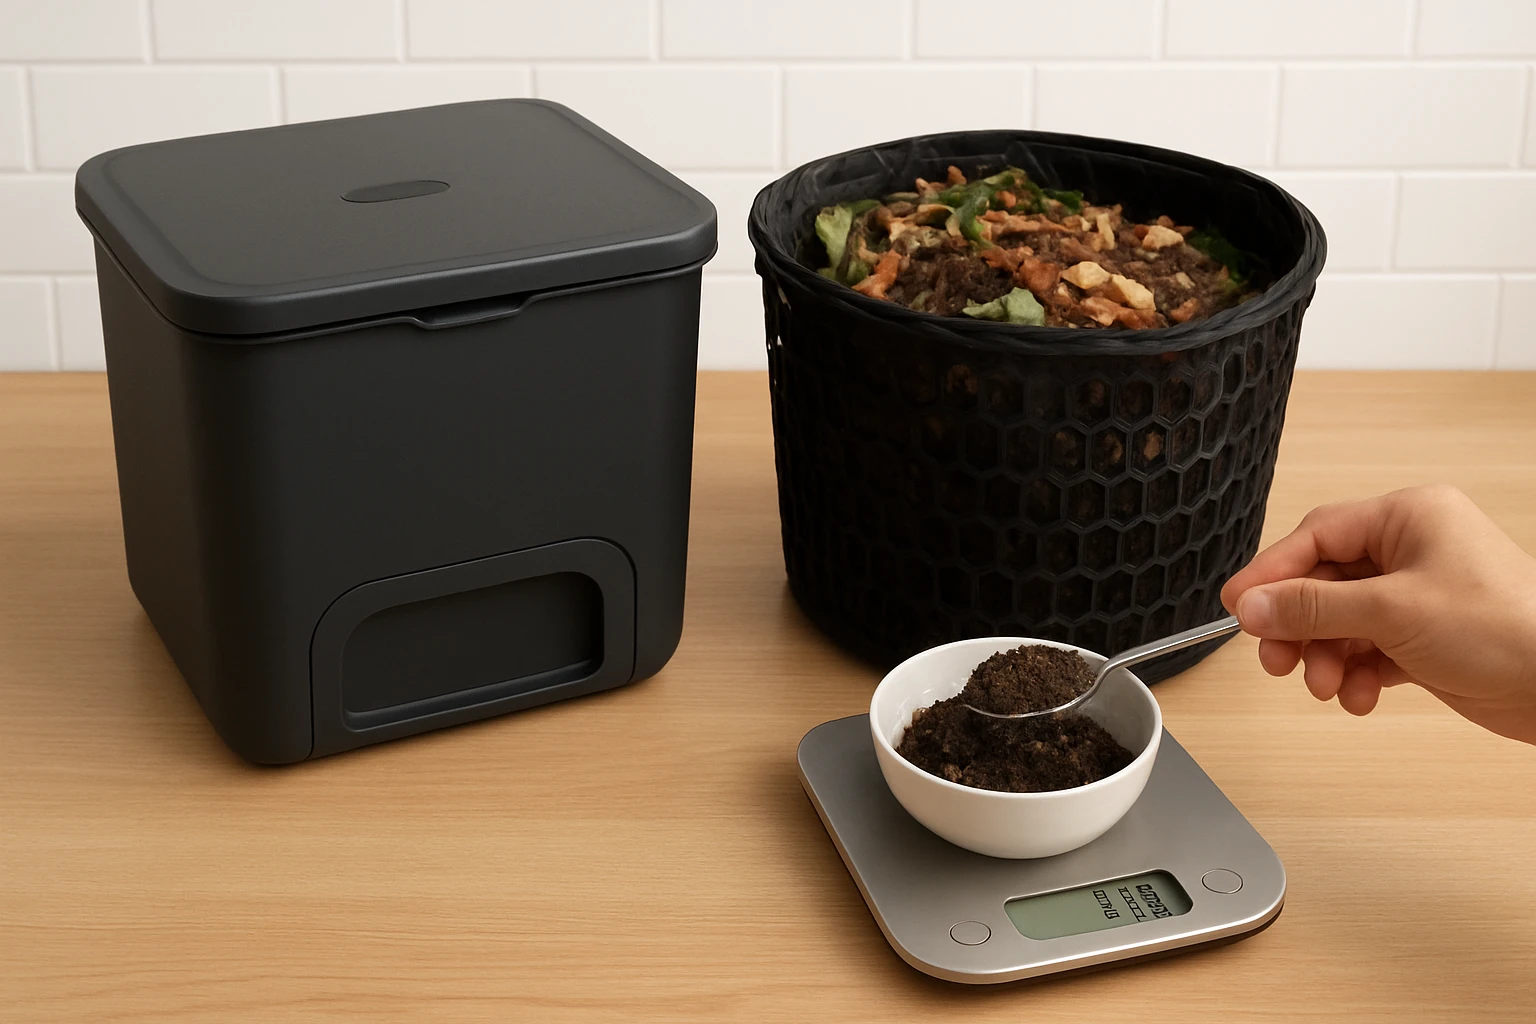
- Geobin Expandable Compost Bin – large‑capacity, easy‑assembly bin for sample collection
Step 1: Prepare a Representative Compost Sample
The first step is to gather a homogeneous sample that reflects typical use of the countertop composter. One should fill the Geobin Expandable Compost Bin with three to four weeks of accumulated material, ensuring the bin is expanded to its maximum 237‑gallon capacity for adequate volume.
This bin is useful because its large capacity prevents compaction, and its excellent ventilation promotes uniform aeration during the test. The product costs $35.99, carries a rating of 4.4 out of 5 stars from 5,554 reviews, and is praised for easy assembly with closure keys. By using this bin, one avoids cross‑contamination and can easily transport the sample to a testing area.
After the bin is filled, gently stir the contents with a garden trowel to achieve an even distribution of moisture and particle size. Record the total weight of the sample using a kitchen scale, noting the mass in grams for later calculations.
Step 2: Measure Initial Moisture Content
Moisture is a critical factor that influences microbial activity and decomposition speed. One should take a small sub‑sample (approximately 200 g) and place it in a sealed plastic bag for ten minutes to reach equilibrium with ambient humidity.
Using a moisture meter, insert the probe into the sub‑sample and record the percentage reading. If a moisture meter is unavailable, one may weigh the sub‑sample, dry it in an oven at 105 °C for 24 hours, and calculate moisture loss by weight difference.
Document the initial moisture level; optimal composting moisture ranges between 45 % and 60 %. Adjustments can be made later by adding water or dry carbon sources.
Step 3: Record Temperature Development Over Time
Temperature reflects microbial respiration and therefore the speed of decomposition. Insert a digital thermometer probe into the centre of the compost mass within the Geobin bin, securing it with a clothespin to prevent movement.
Record the temperature at 12‑hour intervals for a period of seven days. A rise above 55 °C indicates thermophilic activity, which accelerates breakdown and sanitizes the material.
Plot the temperature curve on graph paper or a spreadsheet; the slope of the curve provides a quantitative measure of processing speed.
Step 4: Assess Nutrient Quality Using pH Test Strips
After the seven‑day period, extract another 200 g sub‑sample for pH testing. Dissolve the sub‑sample in distilled water at a ratio of 1:5 (solid to liquid) and stir for two minutes.
Dip a pH test strip into the solution and compare the colour change to the manufacturer’s chart. A pH between 6.0 and 7.5 indicates mature compost suitable for most garden applications.
If the pH is outside this range, one may adjust future feedstock ratios; acidic conditions often result from excess fruit waste, while alkaline conditions may stem from too much wood ash.
Step 5: Calculate Decomposition Rate
To quantify the rate, one can use the mass loss method. Weigh the initial 200 g sub‑sample before incubation, then dry the same material after the test period and weigh again.
The percentage of mass loss equals ((initial weight – final weight) / initial weight) × 100. Higher percentages correspond to faster processing efficacy.
Combine the mass‑loss percentage with the temperature curve to produce a composite score that reflects both speed and quality.
Tips & Pro Tips
- Maintain a consistent feedstock ratio of green (nitrogen‑rich) to brown (carbon‑rich) materials, ideally 1:2 by volume.
- Turn the compost gently every two days using the closure‑key handles of the Geobin bin to improve aeration without disturbing the temperature profile.
- Avoid adding meat, dairy, or oily foods, as they can introduce pathogens and slow down the thermophilic phase.
- For more precise moisture control, use a spray bottle to add water in 5 ml increments until the desired range is reached.
Troubleshooting
Problem: Temperature does not rise above 40 °C.
Solution: Check moisture; dry material will inhibit microbial activity. Add water and mix thoroughly.
Problem: pH remains below 5.5 after the test.
Solution: Incorporate more brown materials such as shredded newspaper or cardboard to buffer acidity.
Conclusion
One has now acquired a practical, repeatable method for measuring the processing efficacy of a countertop composting system. By tracking moisture, temperature, pH, and mass loss, one can identify strengths and areas for improvement in the composting workflow. The use of the Geobin Expandable Compost Bin simplifies sample handling, ensures adequate ventilation, and provides a stable platform for accurate measurements. Continued monitoring will enable one to fine‑tune feedstock ratios and achieve consistently high‑quality compost.
Products Mentioned in This Guide
Frequently Asked Questions
What simple tools are needed to test a countertop composter's processing speed?
You need fresh kitchen waste, a kitchen scale or moisture meter, a digital thermometer, and a timer or stopwatch.
How can I measure the efficiency of my countertop composter at home?
Track the time it takes for a known amount of waste to decompose while monitoring temperature, moisture, and optional pH levels.
Why is monitoring temperature important during compost testing?
Temperature indicates microbial activity; optimal ranges (55‑65 °C) show fast, effective breakdown.
What role does moisture play in composting efficacy and how do I check it?
Moisture supports microbes; use a moisture meter or weigh waste before and after adding water to keep it damp but not soggy.
How can pH test strips help assess compost quality?
pH strips reveal acidity or alkalinity, guiding adjustments to maintain a neutral pH for healthy decomposition.