Introduction
The reader will learn how to produce small‑batch compost using an electric countertop composter, why this method reduces waste, and how it supports sustainable gardening. Understanding the process enables one to transform everyday kitchen scraps into nutrient‑rich material without the odor or mess of traditional bins. The guide provides practical recipes, clear instructions, and expert tips that are applicable to any compact kitchen. By the end of the article, the reader will be able to operate a composter confidently and achieve consistent results.
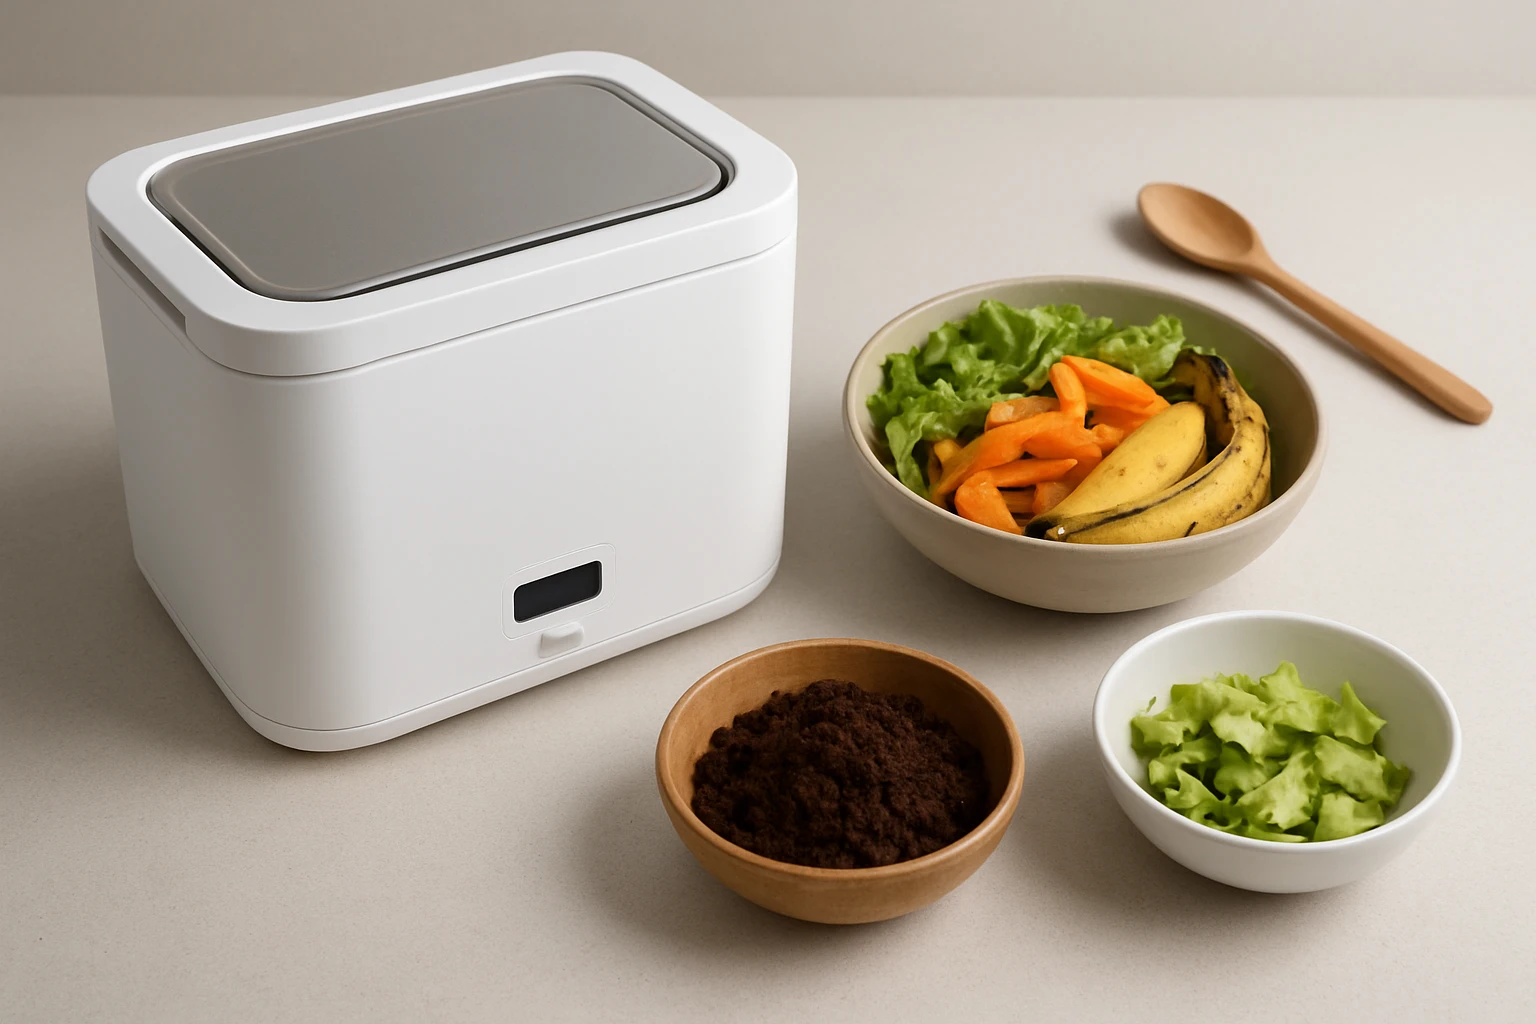
What You’ll Need
- Electric countertop composter (see product recommendations below)
- Assorted kitchen scraps such as fruit peels, vegetable trimmings, coffee grounds, and eggshells
- Reusable carbon filter (included with most models)
- Measuring cup or small container for portion control
- Protective gloves for handling raw material
Step 1: Choose the Right Compaster for Small‑Batch Use
Selecting a composter that matches the volume of daily waste is essential for efficiency. The NutriChef Electric Kitchen Composter offers a 3‑quart capacity, one‑button operation, and a low‑noise, odorless design, making it ideal for apartments and small families. Priced at $193.99 with a rating of 3.8/5 from 141 reviews, it provides a balance of affordability and functionality. Its compact footprint (11.02" x 13.5" x 12.5") fits comfortably on most countertops, and the dishwasher‑safe components simplify cleaning after each cycle.
For users who require a slightly larger capacity and advanced grinding technology, the Food Cycler Eco 3 delivers a 3.5‑liter bucket, patented Vortech™ grinding system, and real‑time LED progress indicators. At $399.99 and a rating of 4.4/5 from 162 reviews, it justifies its premium price through faster processing (as low as 3 hours) and the ability to handle tougher materials such as pits and bones. Its carbon filter ensures an odorless experience, which is valuable in open‑plan living spaces.
For households seeking a high‑capacity, multi‑mode solution, the Vanerepok Smart Composter provides a 4.5‑liter container, four smart modes, and an 820 g activated carbon filter. Priced at $149.99 with a rating of 4.2/5 from 34 reviews, it offers the greatest volume for families while maintaining whisper‑quiet operation at 42 dB. The Smart modes enable quick drying, standard daily breakdown, fermentation for bio‑fertilizer, and self‑cleaning, which reduces maintenance effort.
Step 2: Prepare Your Kitchen Scraps
Before loading the composter, separate wet and dry materials to promote balanced drying. Wet items such as fruit peels and coffee grounds should be mixed with dry, fibrous pieces like carrot tops or paper towel strips. This combination prevents clumping and accelerates the dehydration cycle. One should aim for a total volume of approximately one cup per batch to stay within the small‑batch definition.
Wear protective gloves when handling raw scraps to avoid contamination and to keep hands clean. Place the prepared mixture into a measuring cup to ensure consistent portion sizes, which helps the composter maintain a predictable cycle time. For optimal results, avoid adding excessive oils, large bone fragments, or dairy products, as these can overload the grinding mechanism and produce unwanted odor.
Step 3: Load the Compaster and Initiate the Cycle
Open the removable bucket of the chosen composter and pour the measured scraps inside. Secure the lid and press the single‑button start control; the device will automatically begin drying, crushing, and cooling phases. The NutriChef model completes a full cycle in 6‑10 hours, while the Food Cycler Eco 3 can finish in as little as 3 hours on Quick mode. The Vanerepok Smart Composter offers a Quick mode of 3 hours and a Standard mode of approximately 6‑8 hours.
During the cycle, the built‑in odorless filtration system captures volatile compounds, ensuring the kitchen remains fresh. Users may monitor progress via the LED indicators on the Eco 3 or the digital display on the Vanerepok unit. It is advisable not to open the unit until the cycle signals completion, as premature access can release moisture and compromise the drying process.
Step 4: Retrieve and Store the Pre‑Compost
When the cycle finishes, the composter will emit a gentle beep and the lid will unlock automatically. Carefully remove the bucket, which contains dry, crumb‑like material ready for garden use. Transfer the pre‑compost into a sealed container or directly into a garden bin to prevent reabsorption of moisture.
For indoor gardening, sprinkle the material onto houseplant soil to improve aeration and nutrient content. For outdoor beds, mix the pre‑compost with existing soil at a ratio of one part pre‑compost to three parts soil. This practice enhances microbial activity and promotes healthier plant growth.
Tips & Pro Tips
- Rotate the type of scraps each batch to provide a diverse nutrient profile for the compost.
- Run the composter during nighttime to take advantage of lower ambient temperatures, which can improve drying efficiency.
- Replace the carbon filter every 3‑4 months, or when the odor control noticeably declines.
- Use a small kitchen scale to measure scrap weight; a target of 200‑300 g per batch yields consistent results.
- Combine the Vanerepok’s Ferment mode with a short soak of garden soil to create a liquid bio‑fertilizer for foliar feeding.
Troubleshooting
Problem: Excessive noise during the grinding phase.
Solution: Ensure the unit is placed on a stable, level surface and that the bucket is properly seated. Check that the carbon filter is correctly installed; a misaligned filter can cause vibration.
Problem: Persistent odor despite using the filter.
Solution: Verify that only approved materials are being added. Remove any oily or heavily protein‑rich items, and clean the interior with a mild vinegar solution before the next cycle.
Problem: Cycle takes longer than advertised.
Solution: Reduce the moisture content of the input material by patting wet scraps dry with a paper towel. Overloading the bucket also extends processing time; adhere to the recommended one‑cup portion.
Conclusion
This guide has demonstrated how to produce small‑batch compost using an electric countertop composter, from selecting the appropriate device to harvesting nutrient‑rich pre‑compost. By following the step‑by‑step instructions, readers can minimize kitchen waste, reduce landfill contributions, and enrich their gardens with organic material. Continued experimentation with scrap combinations and mode settings will further refine the process and yield superior results. One is encouraged to adopt this sustainable habit and share the benefits with household members.
Products Mentioned in This Guide
Frequently Asked Questions
What size electric countertop composter is best for small‑batch composting?
A 1‑2 gallon unit is ideal, handling a few cups of kitchen scraps daily without overloading the system.
Do I need to add a carbon source when using an electric composter?
Yes, include dry materials like shredded paper or use the reusable carbon filter to balance moisture and prevent odor.
How often should I empty the finished compost?
Empty the collection bin every 1‑2 weeks, depending on usage, to maintain optimal temperature and airflow.
Can I compost meat, dairy, or oily foods in a countertop composter?
No, these items can cause odor and clog the machine; stick to fruit peels, vegetable trimmings, coffee grounds, and eggshells.
What maintenance does an electric countertop composter require?
Clean the carbon filter monthly, wipe the interior after each cycle, and inspect the power cord for wear.